~ CREATIVE SOAPMAKING ~
January
Sea Soaps
Soap Equipment and Ingredients
My Soap and Lotion Books!


Contents
Sea Products in Soapmaking—Why?
Salt Soap
Seaweed Soaps
100% Coconut Oil Soap
Sand Soap
Classic Soap Ads—Sapolio
What Would I Do?
Tips and Tricks for Soap Equipment
Soap Ingredients FAQ
Soaps from the Past—Aleppo Soap

Sea Products in Soapmaking—Why?

Though I haven't found any evidence of traditional use of seaweed in soaps, there are many modern versions. Many of them make claims of exfoliating, melting fat, or feeding the skin—but whether they do or not is debatable. Salt soaps too are described as exfoliating, which is easy to believe.
Silica (sand) soap was sold as "scouring soap" in the nineteenth and early twentieth centuries.
The main reasons for making soaps with sea products would probably be esthetics and customer demand.
There are many "sea" fragrance oils, but I have yet to find one that doesn't smell like laundry detergent.
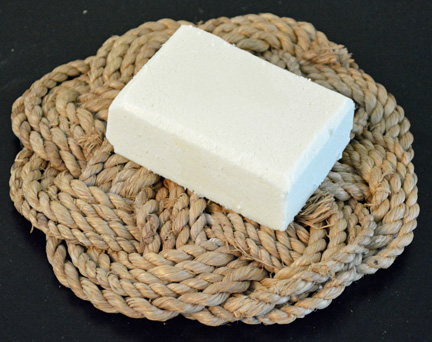
Salt Soap
I was surprised that this salt soap isn't gritty or scrubby. It has a smooth texture, and the lather is thick and creamy. However, I found it very drying.
24 ounces (680 grams) coconut oil
3 ounces (85 grams) olive oil
1.5 ounces (43 grams) grapeseed oil
1.5 ounces (43 grams) refined wheat germ oil
10.5 ounces (298 grams) water
4.8 ounces (136 grams) lye
30 ounces (851 grams) sea salt
Use non-iodized kosher salt or sea salt. Avoid Dead Sea salt, which contains many other minerals and tends to ooze when used in soap.
Melt the coconut oil and combine with the liquid fats. Dissolve the lye in the water. Add the lye solution to the combined fats and blend until well emulsified or at light trace. Add the salt and stir it in well by hand. Pour into molds.
If you use a single block mold, cut as soon as the soap hardens. Made in a block, salt soaps are likely to chip at the bottom of each cut when you slice them. If possible with your soap cutter, cut the block partway through, rotate it 180 degrees, and cut down to meet the first cuts. Or make a very shallow cut, just enough to mark the soap, and rotate the block 90 degrees—that way, you'll have guide lines for where to do the next cut. Cutting precisely on those lines, cut about a third of the way through. Rotate 90 degrees again, and complete the cut. Since there isn't a "bottom" to chip out, you should be able to avoid chips. Wear gloves while you're doing this. Salt soaps harden so quickly, the soap may still be somewhat caustic when it's time to cut it.
Or make it in a tray mold with dividers. If you use this option, line the bottom of the tray mold before pouring the soap in.
Or make the soap in individual molds. To discourage crumbling at the bottom and corners of the bars, freeze the molds for 15 minutes before removing the soaps.
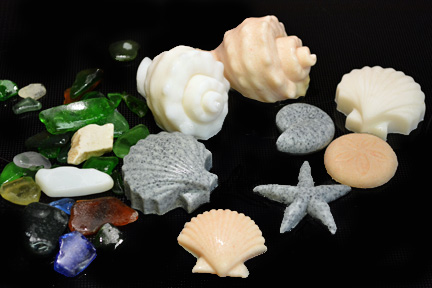
Individually molded soaps made with kosher salt (white), Himalayan pink salt, and black Hawaiian salt. The colors tended to fade over time.
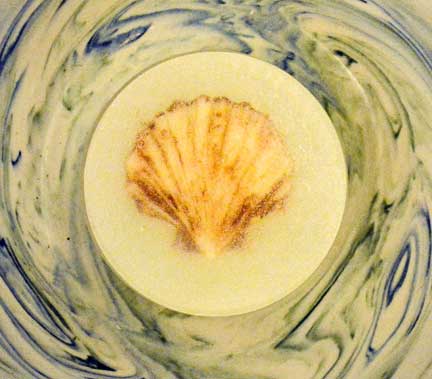
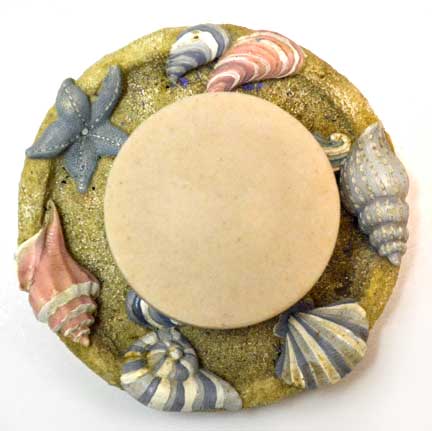
The soaps in the photo above are nice for color samples, but the molds are far too small and irregular in shape to make good soaps. For a fun experiment, I tried suspending them in clear melt-and-pour soap. I enhanced several of the shells with soap paint and suspended them in clear M&P in a round mold. The melted soap base did remove some of the soap paint, but results were attractive.
Seaweed Soaps
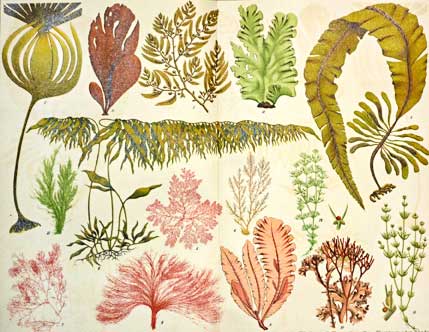
Various seaweeds, from an antique encyclopedia
Not everyone likes the smell of seaweed in soap! It's often described as fishy. Others love it—but start with a very small batch if you want to experiment. Essential oils such as eucalyptus and rosemary are often recommended for use with seaweed.
Seaweed adds some color to soap, but the color may fade as the soap cures.
Don't add large chunks of seaweed to soap. They tend to get slimy in use.
Here are a few types of seaweed you can use in soapmaking:
Kelp—Produces a dark green color. Has a strong scent that fades somewhat as the soap cures. The amount you use makes a big difference in how strongly the soap smells. About 1½ teaspoons would be the maximum for one of my 30-ounce recipes. Add at trace.
Spirulina—Produces a dark green color, and has a lasting scent. The color may fade. For my typical 30-ounce recipe, I'd use about a half teaspoon of spirulina powder. Add at trace.
Nori—A seaweed wrap used in sushi. It's crumbled into tiny bits and added to soap at trace, or infused in the oils or the essential oils. Or it may be cooked and added as a puree.
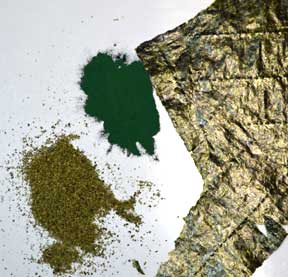
Seaweeds, left to right: kelp, spirulina, nori
100% Coconut Oil Soap
Coconut oil soap is supposedly the only kind that will lather in salt water. I mentioned this to a commercial fisherman I know, and he looked at me like I'd lost my mind. "No one would bathe in the sea," he said. Maybe not. Or maybe, if you're cruising around the world in a small sailboat, you do? In any event, the soap has fine lather. It's superfatted at 20%, so it's not drying.
30 ounces (851 grams) coconut oil
9 ounces (255 grams) water
4.4 ounces (125 grams) lye
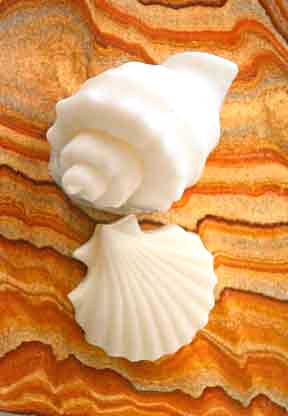
Although it doesn't trace that quickly, the soap sets and hardens very fast. It's a good choice for complex 3-D molds, such as the ones I used for the soaps in the photo. These were made without fragrance or other additives, so they're pure white. (It would be interesting to make them with natural colorants.)
Some soapmakers also use 100% coconut oil soap for salt bars. If you choose to do this, add 30 ounces of sea salt to the recipe. See the salt soap recipe above for comments about mixing, molds, and slicing.
Coconut Milk Variation—Substitute frozen coconut milk for the water. Proceed as for milk soap.
Sand Soap

I was intrigued when a friend told me about sand soap. I decided to try it in the coconut oil recipe because coconut oil soap sets very quickly, which I suspected would be helpful in keeping the sand from all sinking to the bottom.
Add the sand at trace, and keep stirring until the mixture reaches heavy trace.
You can also do this with suspending melt and pour soap base.
I used fine, sanitized sand that's intended for reptile terrariums. With sand this fine and soft, you get a scrub bar. With a coarser sand, it might be used like a pumice block, for heavy exfoliation on feet or other heavy callouses.
I wouldn't just scoop some up from the beach. How much to use depends on how much exfoliation you want—I used 4 tablespoons of sand per pound of oils.
Cold process soap made with fine sand
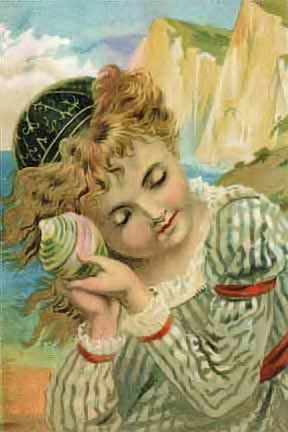
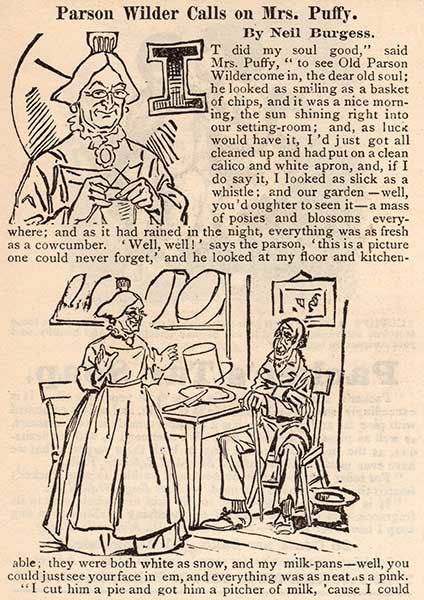
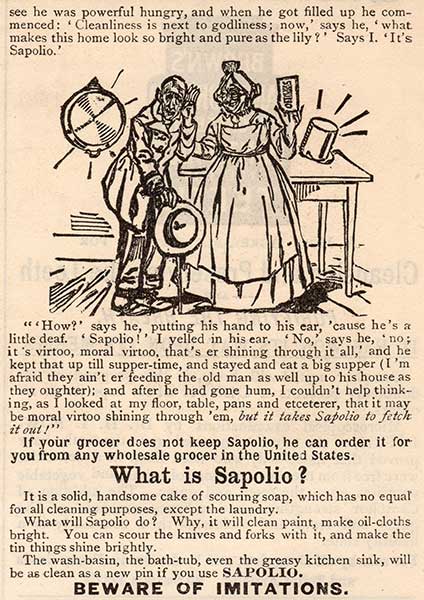
Classic Soap Ads—Sapolio
Speaking of scouring soaps, here's a very funny ad for Sapolio, an early commercial soap of this type.
What Would I Do?

I don't think I'd use black or pink salt in soap again. The color didn't seem stable enough in soap. Actually, I don't think I'd make salt soap at all for my own use—I found it very drying.
What I do plan to do again is make 100% coconut oil soap. I think I'll adopt that one for hand soap for my house. Love the lather!
Tips and Tricks for Soap Equipment
I have contact information in my books, and there are a few questions I get repeatedly. This is just a summary of my answers to frequently asked questions—not a listing of all the things you need. Also, keep in mind that these are my own ideas and preferences. You really need to think about this for your own work, and take or leave anyone else's ideas according to what you decide is right for you.
Goggles
Glasses aren't good enough—however, if you wear glasses, you'll need goggles that fit over your glasses. Also—and this is really important—you must have either fog-proof goggles, or a cloth or cleaner or some other treatment that keeps the lenses from fogging. Because otherwise, you're all but blind—and if you have glasses as well as goggles, completely so. Sometimes these non-fogging goggles and treatments can be found in shops that sell motorcycle gear.
Test whatever you plan to use for soapmaking. Use your goggles and glasses for a cooking task, or wear them when you open your dishwasher at the end of a cycle. Or even just wear them for a while. The last thing you need is for your eye protection to start causing problems while you're making soap.
Gloves
I use dishwashing gloves that are smaller than I'd use for housecleaning or dishwashing. The glove should preserve your dexterity—it's important to not be clumsy.
Shoes
Solid shoes will protect your feet if you spill something. I've never spilled anything, but I always wear them anyway.
Masks
I've tried masks and respirators, and found them only marginally helpful. They didn't compensate for poor ventilation.
Other Clothing
I've used a lab coat, and found it too hot. Another alternative would be a liquid-proof dishwashing apron. Whatever clothing you use, spend a few minutes considering how quickly you could get out of it, if something were to splash on it. Liquid spreads on absorbent fabrics, so a cloth bib apron might keep you from removing a long sleeved shirt as quickly as you otherwise could.
Scales and Weighing
It's tempting to go for more and more accurate scales. Actually, one that is accurate to one gram or one-tenth of an ounce is fine. I use a power supply cord to avoid possible problems with batteries.
Subtractive Weighing—I figured out a handy weighing trick, though it may not work with all scales. When you're weighing solid ingredients such as shea butter, put the whole container of shea butter on the scale and tare the scale. Then, using a spoon, start removing shea butter into your heating container. If you want 30 grams of shea butter, remove until your scale reads minus thirty grams.
Heating and Melting Equipment
I use a microwave oven for melting most solid fats. They can also be melted in a low oven (using a water bath around the container), carefully on the stovetop (in a double boiler), or in any number of small electric warming devices, from mug warmers to bread proofers. Just be aware that fats can cause serious fires, and be careful.
I keep beeswax in a mason jar and melt it in a yogurt maker or slow cooker with a rack and water in the bottom. (This takes much longer than a microwave, so you have to think of this well in advance.) I use the subtractive weighing technique I described just above to remove the amount of beeswax I need, using a plastic spoon. Beeswax can be very hard to remove from things, so I like to avoid any need to do it.
Pots
Stainless steel is the material of choice—but you don't want high-grade stainless steel cookware. Gourmet pots usually have heat-distributing cores in the bottom—which is exactly what you don't want for soap. Thin pots, pots you'd never cook in, are best. I got mine at the local hardware store. Thrift stores are also a good source. A good soapmaking pot should be cheap, for a stainless steel pot, but make very sure it is stainless. It should say "stainless" or "INOX" on the bottom. You can also test with a magnet, but some stainless isn't magnetic. So if it does attract the magnet, it's definitely not aluminum, but if it doesn't, you still don't know. Play this one safe—aluminum plus lye is very bad.
I had an idea that a smaller diameter pot would work better for smaller batches, but it didn't. For some reason, the small diameter caused a lot of suction between the stick blender and the pot bottom. Making soap was a real struggle, and I went back to my old soup pot, tipping it to keep the stick blender submerged.
Thermometers
Thermometers are very helpful when you're learning. You don't need an expensive one. A waterproof digital instant-read food thermometer is just fine. The one I use for teaching costs less than $15.
Once you know exactly what trace looks like, you probably will never need a thermometer again. It's a learning tool, that's all.
Remote infrared thermometers are a waste of money for soap. They cost a lot and don't last long under soapmaking conditions.
Stick Blenders and Other Mixing Equipment
Stick Blenders
My first stick blender was one I picked up at a thrift store. It worked OK.
When I was just finishing one of my books—I think it was Milk Soapmaking—the silly thing tanked. I had to run off and get a new stick blender in a hurry, and the thrift store didn't have any. Annoyed, I bought a fairly pricey one at a department store. Pricey was all they had.
I got home and went back to making my soap. The difference between the new stick blender and the old one was unbelievable. It really is worth getting a good one.
Countertop Blenders
I wish they were bigger! They're much easier to use than a stick blender, with less fumes and more thorough mixing. I think they're faster, too.
Larger commercial ones are available, but they cost more than I'm willing to pay. So I use my countertop blender for my small test batches.
If you want to use a countertop blender, I recommend one with a glass container, especially if you're planning to use it for anything but soapmaking. Plastic works, but the blender jar becomes frosted from soapmaking. I have a blender with a six-cup container, and it will handle slightly under one pound oil weight of soap—which makes about four bars.
Experiment with your blender before using it for soap—find out its maximum liquid capacity by testing with water. You can't fill them to the top—they will overflow when you turn them on.
Electric Mixers
You can use a heavy stand mixer for fairly small soap batches. Use a paddle attachment, if there is one—otherwise you'll be mixing lots of air into the soap. On the other hand, there's nothing particularly wrong with floating soap. Ivory made a name for themselves with it.
Two big caveats: You must use a spatter shield for the bowl. And you must, must, must make sure there's no aluminum where the raw soap will touch it. Use a magnet to test every part of your mixer. If a magnet doesn't stick to any of the metal pieces, don't use that mixer around soap.
Stand mixers are used for whipped soap, with some beautiful results.
Molds
I prefer silicone molds—it's so much easier to remove the soap. And you can put them in the dishwasher. Most can even be used for CPOP, although it's a good idea to ask the vendor about temperature. One consideration with silicone molds and CPOP, though—a wood mold will hold the warmth much longer after you turn your oven off, so may be more effective.
However, I have bought one silicone mold that smelled absolutely horrible, like toxic waste. And several that were pictured online in such a way as to make you think the soaps were reasonable-sized—only to find they were about the size of a single grape. I'm not sure what molds of this kind are for—possibly decorative add-ons for candles? Regardless, they're often mislabeled as soap molds, and even when they're basically nice, they're not soap molds.
Another issue with silicone baking molds is color leaching. I've had this only with red molds that were intended for baking use rather than specifically for soap.
Soap with bleeding color from red silicone mold
One silicone mold—and this one was sold by a reputable company as a soap mold—sort of melded into the soap. Once the soap had set, there was no actual point where the soap ended and the mold began. There was soap on top, grading into a substance that resembled tile caulk, and the outside of the mess still looked like normal silicone. I had to throw the whole thing away. (They are no longer selling this item.)
Be aware that not all shapes make good soap. Many of the shell shapes I show here aren't really a good choice for molds, interesting as they may be for color samples. I'm no fan of soaps that are impractical, including those that are "too pretty to use."
pH Testing
I recommend pH papers, and they must be able to show values at least from 7 to 14. It doesn't matter if they can also show values below 7, but it doesn't help anything, either. pH papers will NOT give you exact pH information. What they will do is let you know if you have very high pH, either overall or in spots. I test a spot or two on most batches, and much more if anything looks unusual.
The last time I tried a pH meter, it didn't work well. I contacted the manufacturer, who told me that inexpensive pH meters don't work well for soap. Whether that's still true, I don't know. But I wouldn't spend money on one again, unless I was sure it would work.
Saving Money on Equipment
It's not unlikely that you can find a great stainless steel pot at a thrift store. And, as also mentioned above, you don't need an especially high-quality thermometer. Inexpensive pH papers work better than pH meters. I've also found silicone muffin pans and loaf pans on thrift store shelves. As well as rubber spatulas, spoons, and other cooking gear.
All kinds of found objects can be used for soap molds, from reusable-disposable food containers—sold as "Gladware" and under other trade names in the wrap and bag aisle of most supermarkets—to the quart-size milk cartons I mention in Smart Soapmaking.
Soapmaking books usually show glass measuring cups used for weighing containers, but unless the container will be heated, it's fine to use old peanut butter jars, or any other ordinary jar with a mouth that's wide enough to be practical. If a container will be heated, a mason jar works perfectly—and thrift stores often have them by the dozen.
I'm asked many times if I reuse my cooking equipment for soapmaking. I do—EXCEPT for plastics, which pick up fragrance. If glass or stainless steel equipment is cleaned properly, it is perfectly safe to use for both cooking and soapmaking.
Cleaning Your Equipment
It's a big, big exception for me to mention a brand name—but in this case, I will. Of all the washing methods I've tried, this is the best:
Using NO water, squirt Blue Dawn dishwashing liquid onto the surfaces of your pots and utensils. Work up a lather with a dishwashing brush. Then rinse thoroughly. If you have a dishwasher, run the soapmaking equipment in a regular load with dishwasher detergent. If not, repeat the hand wash treatment once.
It helps a lot to have a stick blender with a detachable blade that can go in the dishwasher. For the initial cleaning, though, run the stick blender for a minute in a container of clear, warm water. This helps clean the back sides of the blades, which can be hard to keep free of soap and scale.
If you use a countertop blender, fill the jar about a quarter full with clean water after the soap is poured. Run it for half a minute or so. Then dump the water, disassemble the blender, and wash each piece separately or in the dishwasher.
Soap Ingredients FAQ
Here are the questions I've been asked over and over about ingredients.
Is "almond oil" the same thing as "sweet almond oil"?
Yes. Bitter almond oil exists, but it's rare and will be specially labeled.
Should I use refined or unrefined shea butter? What about other fats?
Depends what you want. Unrefined shea butter and many other unrefined fats have scents of their own. The scent of various batches of unrefined shea butter varies but can be straw-like, walnut-like, or even smoky. I recommend it for use with fairly sturdy, not-sweet scents, such as musk, amber, patchouli, or sweetgrass. For a delicate floral scent, I'd use refined.
Unrefined wheat germ oil smells strongly like vitamin pills. Refined is much better.
Other unrefined oils have more or less scent, and the best plan would be to try a small amount from your chosen vendor and see whether it works for your use.
Unrefined oils often have more color, too, which may be desirable or not, depending on the look you want.
Should I use extra-virgin olive oil?
No. It's a waste of money to use fine olive oil in soap. In fact, less expensive olive oil often works better—it's less expensive because it doesn't have the fine olive scent that the good stuff does. Olive scent is great in salad dressing, but who wants to wash with it?
Also, extra-virgin olive oil is sometimes adulterated. I haven't heard of any cases of adulteration with inexpensive olive oil—probably it's not worth their trouble.
Is pomace better than other olive oil? Does it saponify faster?
As far as I've ever noticed, no and no.
Does shea butter accelerate trace? Is it true that you can't use shea for more than a small percentage of the fats?
I've heard over and over that shea accelerates trace, but have never experienced it. I've made lots of soap that's one-third shea butter. When I was in the soap business, someone told my partner one day, "You can't make soap with more than 10% shea butter." She looked around at our stock and said thoughtfully, "Oooohhh. Wonder what all this stuff is, then..."
Is grocery store coconut oil the same as "76 degree coconut oil"? What about 92 degree coconut oil? Fractionated coconut oil? Virgin coconut oil?
Grocery store coconut oil is the same as 76 degree coconut oil.
92 degree coconut oil is hydrogenated. I've never used it.
Fractionated coconut oil is a liquid that's different from any other type of coconut oil. You can't substitute in recipes.
Virgin coconut oil is unrefined 76 degree coconut oil. It's more expensive, and its coconut odor may be lost in saponification.
What kind of lye do you recommend?
For general use, bead lye. It must be 100% sodium hydroxide. In some states you can get it in hardware stores and grocery stores. In others, you can't.
Microbead lye is great for use with cold mixtures, but it's much more likely to scatter or be moved in an air current than bead lye is. I wouldn't recommend it for beginners.
I don't care for flake lye, and definitely don't recommend it for cold mixtures. It's somewhat easier to handle, but it's much harder to dissolve.
Soaps from the Past—Aleppo Soap
Aleppo soap is one of the oldest of the traditional soaps. It is made from a combination of olive oil and bay fruit oil. Bay fruit is the berry of the bay laurel tree, and the oil is not the same as bay laurel essential oil, which is distilled from the leaves.
Up to 30% of the oil is bay fruit oil, the rest is olive. Traditionally, the soap is produced by a lengthy industrial hot process.
Bay fruit oil is difficult to find in small quantities. The soap is hard and long lasting, but the sample I bought wasn't particularly exceptional in terms of aesthetic appeal. It's not one I'd go to great lengths to make.